Exploring SwiftUI
Inspiration
In all my forays into building build mobile applications, the part I dreaded the most was doing any sort of complex UI design. The most common ways to do UI design in XCode are using Auto Layout or defining the layout in .xib files. I have worked with both and my personal experience is that with enough tinkering and knowing some little hacks, it is possible to get everything working. However, it is an uphill battle regardless.
When during WWDC2019, Apple annouced SwiftUI, an declrative way to design UI and couple logic to them, it piqued my interest. SwiftUI seamless integrates with existing applications, behaves as a first class citizen and gives you so many free affordances like auto implementing Dark Mode and Accesibility features.
I dove in to write a small game to learn SwiftUI and I was surpised as to how quickly I could get it up and running.
Building a small game using SwiftUI
The game
To say the game that I want to design is simple would be overselling it. The premise is, you are given a colour and you have to choose from an option of 4 different colours that match the given colour. Each time you guess right, your score goes up by 1 and when you get it wrong it resets to zero.
I chose such a simple game because I wanted to make something interactive using just SwiftUI without having to rely on any other major APIs like SpriteKit.
Laying out the board
Laying out the UI in SwiftUI is done by defining a View (the atomic unit of each UI component), the View itself can be composed of many subviews. SwiftUI uses HStacks, VStacks and ZStacks to arrange the different components inside a View.
struct ContentView: View {
var body: some View {
VStack {
Text("Color Picker Game")
Text("Score:")
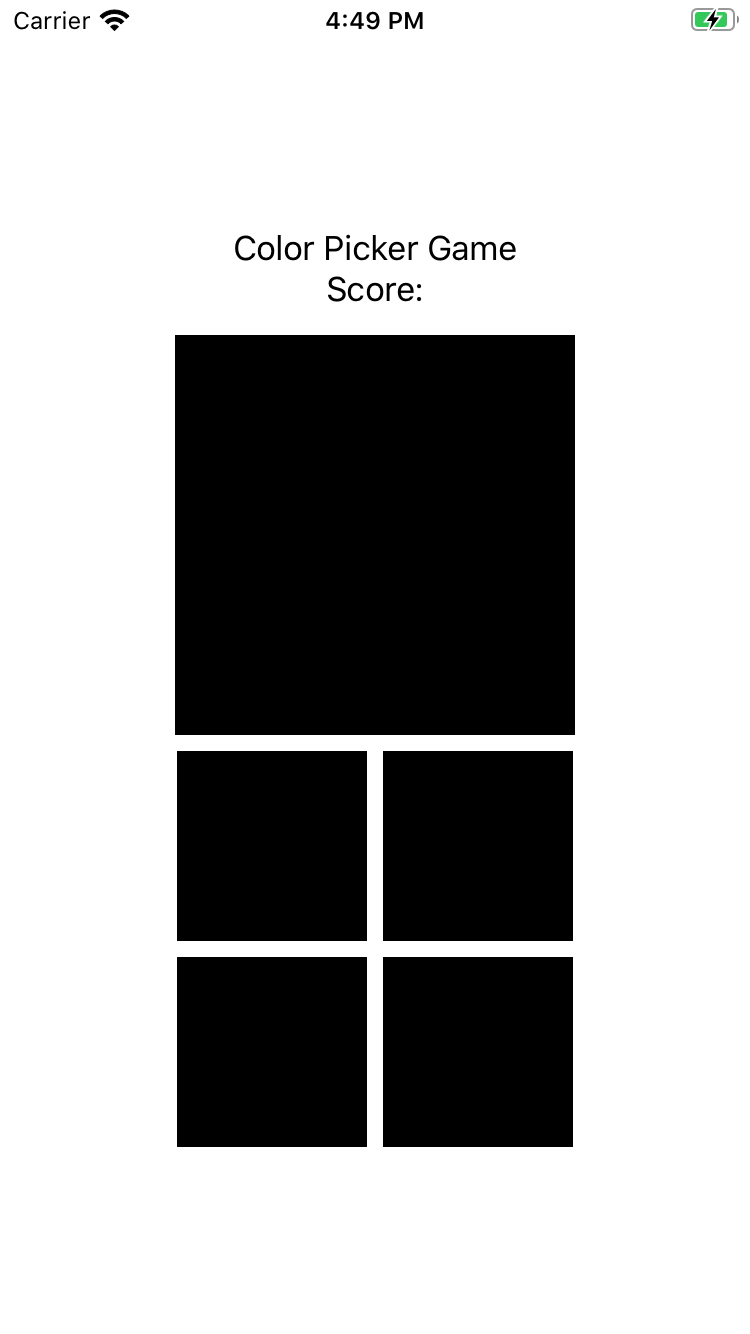
Rectangle().frame(width: 200, height: 200)
HStack{
Rectangle()
.frame(width:95, height: 95)
Rectangle()
.frame(width:95, height: 95)
}
HStack{
Rectangle()
.frame(width:95, height: 95)
Rectangle()
.frame(width:95, height: 95)
}
}
}
}
The above code defines a few text fields, it defines a rectangle (the colour in question) and it defines the 4 options that would be the answers. This is how the app looks at this stage:
Refining the UI
In just a handful lines of code, I was able to get the basic layout of the app ready. It didn’t take much to polish the UI just a bit more before I dove into the logic.
VStack {
            Text("Color Picker Game").font(.largeTitle)
            Text("Score:")
            Rectangle()
                .fill(Color(.black))
                .frame(width: 200, height: 200)
                .cornerRadius(10)
           ...
           ...
           ...
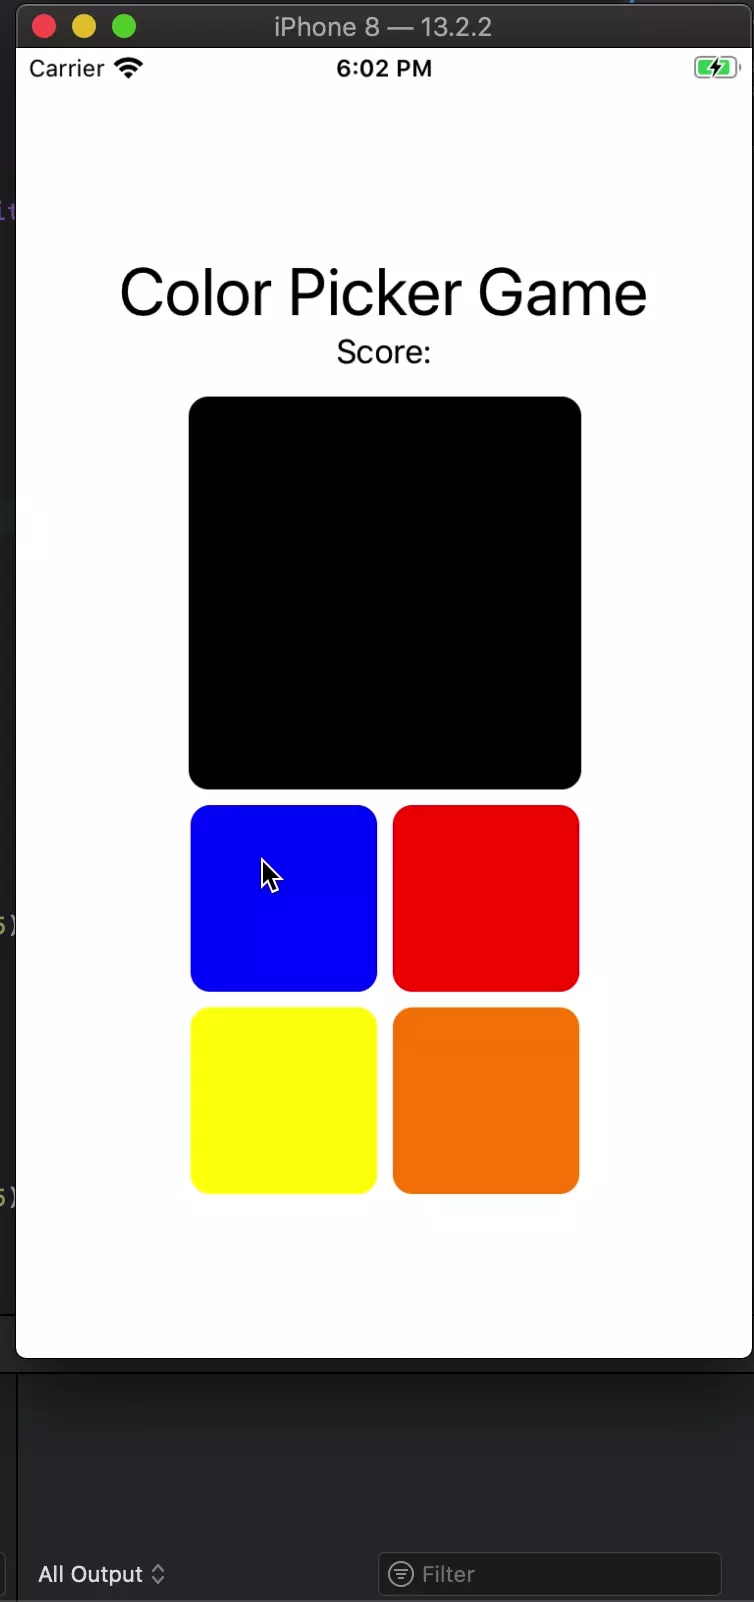
SwiftUI allows for quick chaining of attributes to UI elements that are intuitive and scale well across different devices and screen-sizes. With the code above, I was able to add properties to the Rectangles and the Text elements. The Resulting UI looks a crisp better.
Adding Interactivity
Before I can write the very little game logic that is required, I need to make the elements on the screen interactive.
HStack{
                Button(action: {
                    // What to perform

                   print("button got pressed!")
                }) {
                    // How the button looks like

                   Rectangle()
                    .fill(Color(.blue))
                    .frame(width:95, height: 95)
                    .cornerRadius(10)

                    ...
                    ...
                    ...
Defining a button in Swift and adding an action to it is very intuitive as easy to get running. No more defining IBOutlet and figuring out the delegate.
Game Logic
At this stage, the app has 4 buttons that are interactive. The next step would be to bind some data and logic to the game.
Like React, what is seen on the screen is a direct result of the State variables of the app. This is where the declarative nature of SwiftUI shines! Instead of defining the complete control flow, the entire UI is defined as a possible outcomes based on the state of the variables.
import SwiftUI
import UIKit
struct ContentView: View {
@State private var variance:Double = 40
@State public var winner:Int
@State private var score:Int = 0
@State public var mainColor:Array<Double>
@State public var tileColors:Array<Array<Double>>
func mutateRandomly(n: Double, variance: Double) -> Double {
let mutateFraction = Double.random(in: 0...variance)
let addOrNot = Bool.random()
if(addOrNot == true) {
return n+mutateFraction
}
else{
return n-mutateFraction
}
}
func randomColorMutator(originalColour: Array<Double>, variance: Double) -> Array<Double> {
//variance defines the amount by which the colour should vary in percentage
let newRed = self.mutateRandomly(n: originalColour[0], variance: variance)
let newBlue = self.mutateRandomly(n: originalColour[1], variance: variance)
let newGreen = self.mutateRandomly(n: originalColour[2], variance: variance)
return [newRed, newBlue, newGreen]
}
func randomColorGenerator()->Array<Double> {
return [Double.random(in: 0...255), Double.random(in: 0...255), Double.random(in: 0...255)]
}
func setWinnerTile() {
self.winner = Int.random(in: 0..<4)
}
func setBoard() {
self.setWinnerTile()
self.mainColor = self.randomColorGenerator()
for index in (0...3) {
if(index != self.winner) {
tileColors[index] = self.randomColorMutator(originalColour: mainColor, variance: variance)
}
}
self.tileColors[self.winner]=self.mainColor
}
func evaluate(pressed: Int) {
if(pressed == self.winner) {
self.score = self.score + 1
self.setBoard()
}
else {
self.score = 0
self.setBoard()
}
}
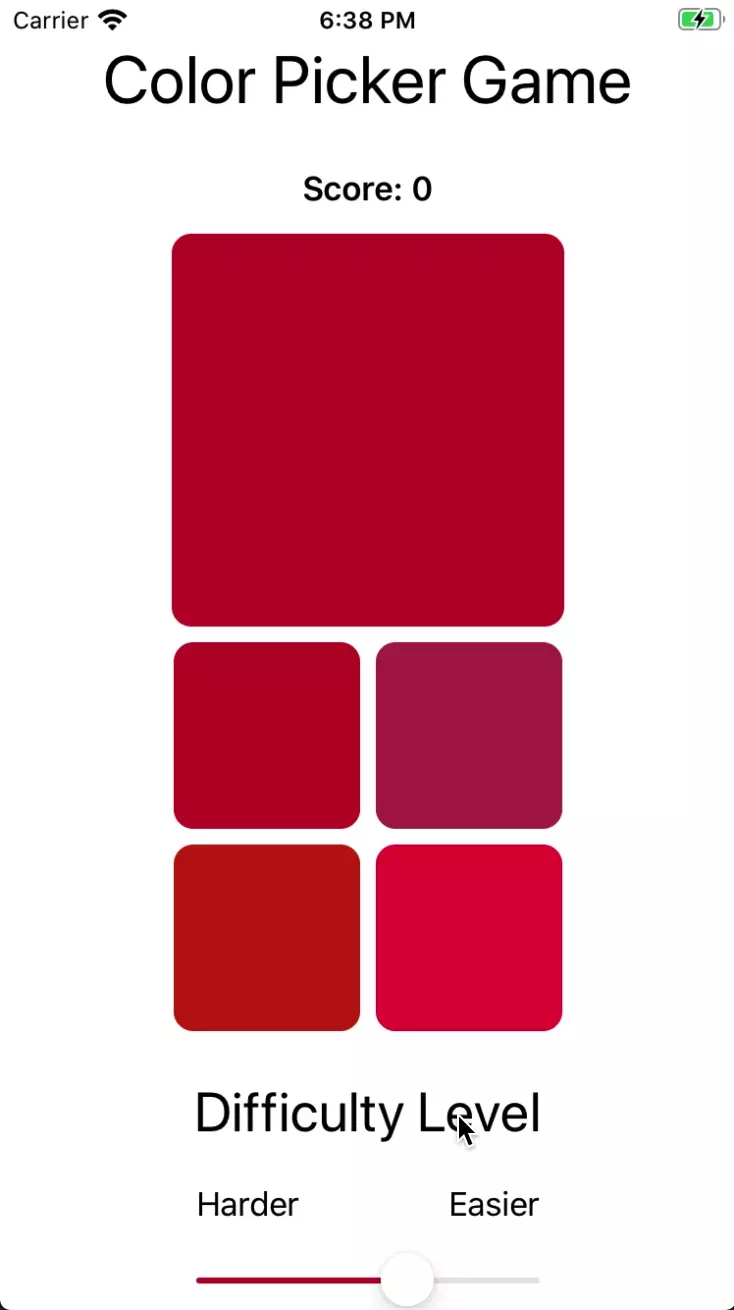
var body: some View {
VStack{
Text("Color Picker Game").font(.largeTitle)
Spacer()
Text("Score: "+String(self.score)).bold()
Rectangle()
.fill(Color(red: self.mainColor[0] / 255, green: self.mainColor[2] / 255, blue: self.mainColor[1] / 255))
.frame(width: 200, height: 200)
.cornerRadius(10)
HStack{
Button(action: {
// What to perform
self.evaluate(pressed: 0)
}) {
// How the button looks like
Rectangle()
.fill(Color(red: self.tileColors[0][0] / 255, green: self.tileColors[0][2] / 255, blue: self.tileColors[0][1] / 255))
.frame(width:95, height: 95)
.cornerRadius(10)
}
Button(action: {
// What to perform
self.evaluate(pressed: 1)
}) {
// How the button looks like
Rectangle()
.fill(Color(red: self.tileColors[1][0] / 255, green: self.tileColors[1][2] / 255, blue: self.tileColors[1][1] / 255))
.frame(width:95, height: 95)
.cornerRadius(10)
}
}
...
...
...
SwiftUI is maintaining the State variables to determine the state of the UI componenets in the app.
- The function
mutateRandomlymutate a number within bounds of a fixed percentage - The function
randomColorMutatorwraps the mutateRandomly function to mutate a set of RGB values that would mutate a coulour within fix bounds - The function
randomColorGeneratorgenerates a random colour that would be our starting point for every round - The function
setWinnerTilesets a random tile among the 4 options as the one that would be the correct answer - The function
setBoardsets the board afer the end of each round, it firsts sets a correct tile, it then generates a random colour. It then sets the colours on the remaining three tiles based on a mutation value that is set within the bounds - The function
evaluateis used to check if the correct tile was picked and adjusts the score accordingly
Final Touches
I added a vibration when the user gets a wrong answer and a difficulty slider to adjust the variance bounds to make the game just a tad better.
Conclusion
Learning SwiftUI was a lot of fun. It is very easy to get started, build a UI and do most of what we want an app to do relatively quickly. Adding logic to the app is a breeze and the fact that the SwiftUI can be a part of the whole of a View and that it seamlessly integrates with UIKIt makes it all the more powerful.
SwiftUI strongly reminds me of another app framework that I have been playing around with recently: Flutter. Google’s Flutter is also a declarative way of builiding your apps that can be cross-compiled to Android as well.
The code for the complete project is available on my Github.
« Dark Mode 🌚 🌝
The case for Federated Search Engines »